Documents - Adding and Editing
There are several areas in kiosk where you can add or view documents and images. For example, in Employee Details | Personal Details, Expense Details | My Expenses, and in all Employee HR Details options. In addition, in kiosk OHS you can add documents to Incidents, Hazards, Plant and Audits.
Adding a Document
To add a document, you need to access the relevant document tab, such as Incidents Documents.
- Once you are in the Documents tab, click New.
The DocumentEdit screen will open. -
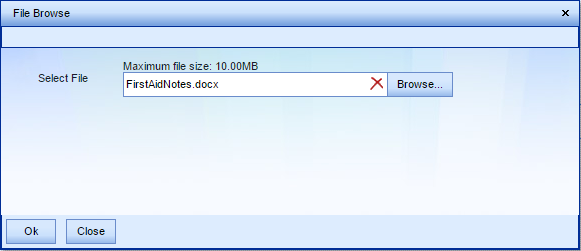
Click Browse to the right of the File field, and then Browse to find the file you wish to load.
- Click OK - this will store the document in the HR3people database, then click Close.

- Complete the following information, as required:
When you add a document in kiosk, this will load a copy of the document into the database. Therefore there are two important considerations:
File Size
There is a 10Mb file size restriction when adding documents, however be aware that each time a document is added this will increase the size of the database. If many people are adding documents, particularly if they are very large documents, this could start to slow down the performance of kiosk.
We suggest that users are asked not to add documents unnecessarily. They should consider if adding it via kiosk is relevant, or whether another method of document sharing is more appropriate, such as sending by email or saving in relevant shared areas in a network. Alternatively, for HR3 payroll users, we suggest attaching documents in payroll instead of loading them in kiosk - this means the document can be viewed in kiosk also.
Editing
- To open the document, click Open Document to the right of the document name .
- You are then given the option of opening or saving the document.
- Choose Open if you are only viewing the document.
- If you will be making changes to the document, and want these changes to be made to the original document, you need to consider where the original document is located. We suggest the following processes for updating the document:
- If it is in a network location and you don't have access to this, you may choose to Save the kiosk copy to a local location (e.g. your Desktop) and make the changes. When you then have access to the network, you would need to remove the original document and save the updated version in its place. (Note that you should also adhere to any document control processes in place in your organisation.)
- Alternatively, Save the file with the same name and in the same location as the original (i.e. to overwrite it) and make the changes.
- Whichever method you choose, once you have updated the document, you will need to Upload the new version to kiosk:
- Select the entry in the Documents tab and click Edit.
- Click Browse and locate the updated version of the document.
- Click Upload. Then Save and Close.
- This will retain all the original details, such as Document ID, but update the Modified date.
Document Store
This option links to the documents/images that have been stored within
When a document/image is added in kiosk, the HR3Kiosk Publish option is activated automatically. This occurs 'in the background', i.e. within HR3 payroll Document Store, so that the system administrator is able to see that the document/image has been added.
